TaxConnections Tutorials
We have provided easy to follow tutorials that will help you promote your tax professional profile to the largest possible number of people searching for your tax expertise. Please take the time to learn these tutorials with these instructions. If you have any questions please call the office at 858.999.0053 and we will be happy to help you.
- What Is A Tax Professional Membership?
-
- Corporate Tax Professionals
- Independent Tax Services Professionals
- Public Accounting Tax Professionals
- Tax Lawyers/Tax Counsels
- Tax Advisors/Tax Consultants
- Tax Associations/Societies
- Students/Academia
Tax Professionals who join TaxConnections do so to build higher visibility and authority for their tax expertise! TaxConnections is a tax professional media site that promotes tax professionals throughout the United States and more than 100 other countries around the world.
What type of Tax Professionals can you find on TaxConnections?
- You belong to the most technologically advanced media site for tax professionals.
- Raise your authority as part of a community of tax experts/tax advisors.
- Attract more clients and business from people searching for tax expertise.
- Better interaction between tax advisors and prospective new clients.
- Promote your books, videos, publications and blogs to an interested audience.
- Distribute your tax blogs or answered tax questions to a worldwide audience.
- Attract referral business from other members in our tax community.
- Secret strategies and programming codes to drive more traffic to you.
- Access our Resource Library with valuable templates and information.
- Find A Tax Job simply by promoting your availability in the market.
What are the primary benefits of a Tax Professional membership?
- Go to www.taxconnections.com and click on Tax Professional Sign Up at the top of the page.

How does a Tax Professional Sign Up?
What does a Tax Professional Membership cost?
Membership is $299.95 Annually or $29.95 Monthly. Annual membership is a better deal as you save $60.00!
- What Is A Taxpayer Membership?
-
- Taxpayer Memberships are free to all taxpayers who want to accomplish the following:
- 1. Find A Tax Professional
- 2. Ask Tax Questions
- 3. Access Informative Tax Blogs
- 4. Get An Education
- How To Find A Tax Professional
-
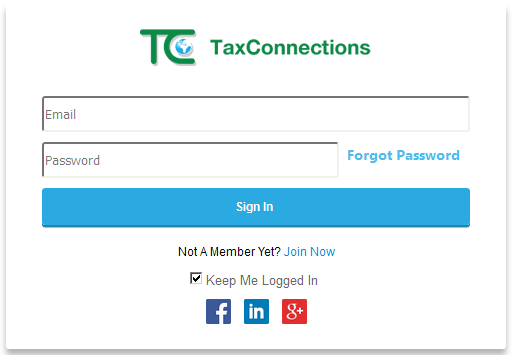
- Go to www.taxconnections.com and Login.
- a) Sign Up as a Taxpayer (Membership is FREE!)
- b) Sign Up as a Tax Professional (Get Listed)
- Across every page of the TaxConnections site is the Header Bar and it looks like this bar below…
- Click on Find A Tax Professional and this will take you to the following page:
(Special Note: We rotate cities around the world in the background of this page.)

Type in what type of tax professional are you searching for (i.e. by name, tax expertise, location, degree, certification, country, state, postal code, etc..) - A screen will appear with one or many tax professionals based upon what you typed into the Find A Tax Professional open field.
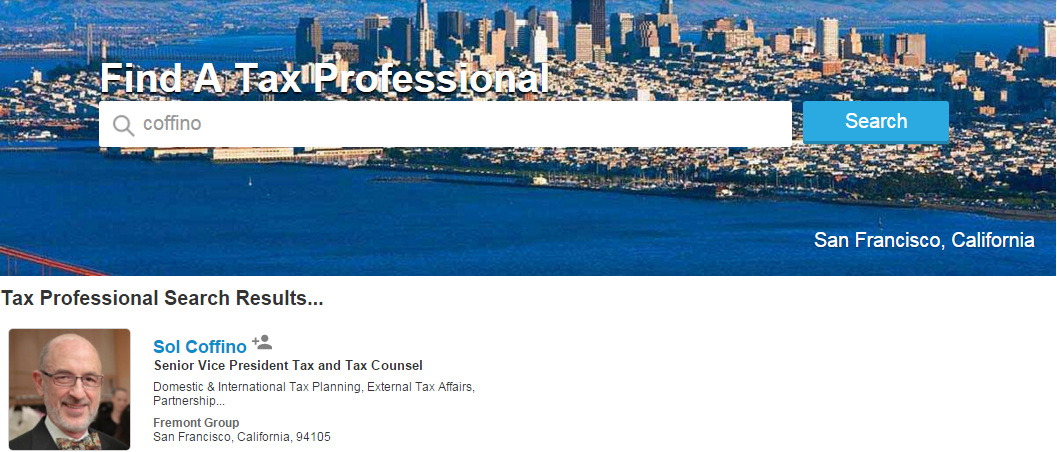
- Now click on the tax professionals photo you are interested and this will take you to their full Professional Profile page. You can review their full profile and evenSend A Message.
- TaxConnections never charges a fee to Send A Message to a tax professional nor do we charge our members a fee to accept your messages.
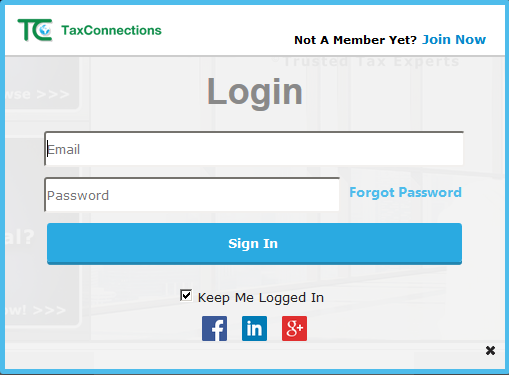
If this is your first visit to TaxConnections, you have two available options:


- How To Send A Message To A Tax Professional
-
- Go to www.taxconnections.com and Login.
- a) Sign Up as a Taxpayer (Membership is FREE!)
- b) Sign Up as a Tax Professional (Get Listed)
- Across every page of the TaxConnections site is the Header Bar and it looks like this bar below…
- Click on Find A Tax Professional and this will take you to the following page:
- Click on the photo of the tax professional you want and then their full page profile will appear. Just below their photo is a
Send Message envelope. - When you click on Send Message a Pop Up screen will appear asking you to introduce yourself to the person.
Our tax professional members will receive the message request from you.
If this is your first visit to TaxConnections, you have two available options:

Type in what type of tax professional are you searching for by name, tax expertise, location, degree, certification,
country, state, postal code, etc…

- How To Ask Tax Questions
-
- Go to www.taxconnections.com and Login.
- a) Sign Up as a Taxpayer (Membership is FREE!)
- b) Sign Up as a Tax Professional (Get Listed)
- Across the top of every page of TaxConnections is the Header Bar and it looks like the one below.
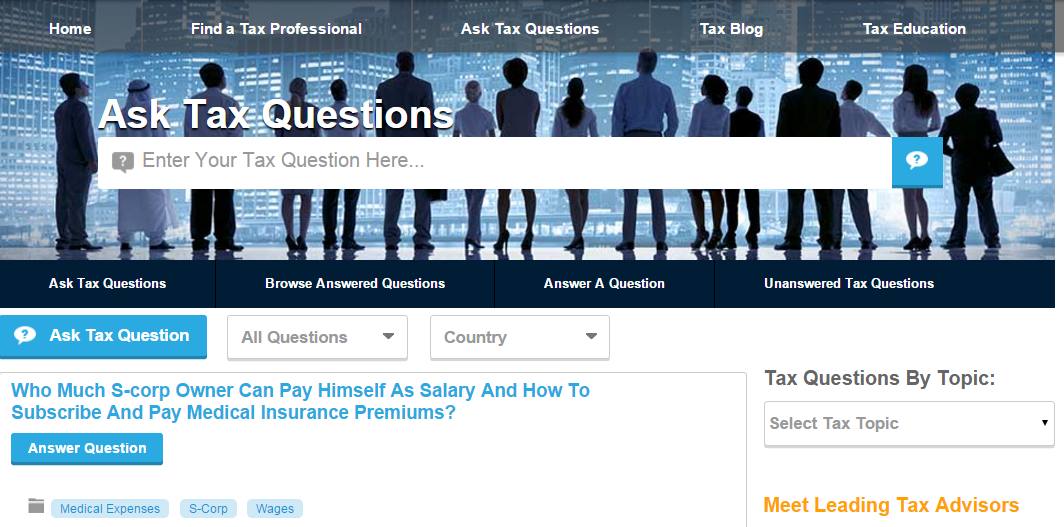
- Click on Ask Tax Questions and you will be redirected to the page below. Type your tax question into the bar below
that displays Enter Your Tax Question Here... - When you type any letter into the search bar Enter Your Tax Question Here you will be redirected to the Ask Tax Questions
page you see below and here is what you need to do.
a) List country tax is located
b) Type your tax question into text box
c) Provide more details on income/location, etc
d) Tag your question with a topic
e) Write in tax topic ( i.e. individual, partnership, corporate tax, federal, state, local, property, sale and use)
f) As soon as you type in a topic a pop up will appear with some ideas for topics. If you do not see a tax tag topic
that relates to your question, simply click Add More+ to add a new tax that relates to your question.
g) Click on box that states “ I agree…” and then click blue button that states Submit Tax Question
If this is your first visit to TaxConnections, you have two available options:
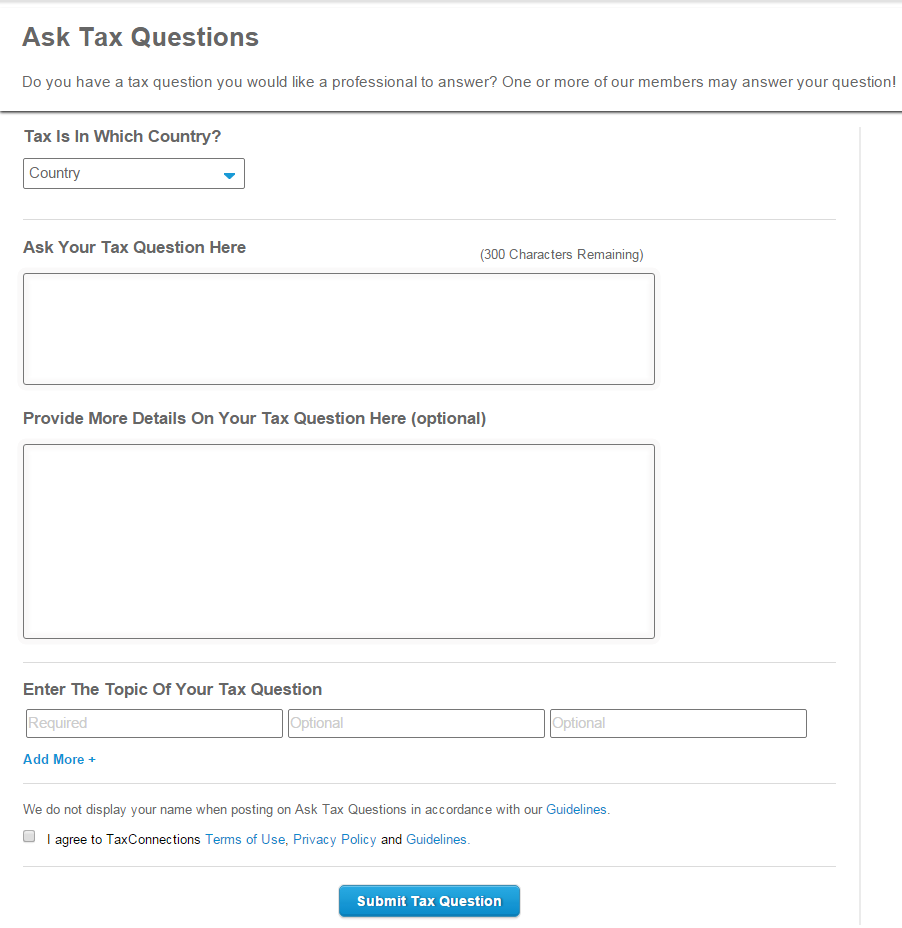
SPECIAL NOTE: Type any letter into the Enter The Topic Of Your Tax Question above and a list of topics from A-Z will appear to give you an idea of how to tag the topic. If we currently do not have a topic tag that fits your subject matter, click on Add More+.

Your Tax Question will appear on the Ask Tax Questions landing page. We never publish the name of the person who submitted the tax question. We know people prefer to remain anonymous when asking tax questions.
You will be notified via email when one of TaxConnections Members answers your tax questions. Our members receive extra promotion on TaxConnections for answering your questions.
- Search Previously Asked Tax Questions-With Answers
-
- Go to www.taxconnections.com and Login.
- Across every page of the TaxConnections site is the Header Bar and it looks like this bar below…
- Click on Ask Tax Questions in the Header Bar and you will be redirected to the following page:
- Click on All Questions and then click on Answered Questions.
- Make certain you also Select Country to refine the location.
- You also have the ability to refine by topic with Tax Questions By Topic.

- Write A Review On A Tax Professional
-
- Go to www.taxconnections.com and Login.
- a) Sign Up as a Taxpayer (Membership is FREE!)
- b) Sign Up as a Tax Professional (Get Listed)
- Across every page of the TaxConnections site is the Header Bar and it looks like this bar below...
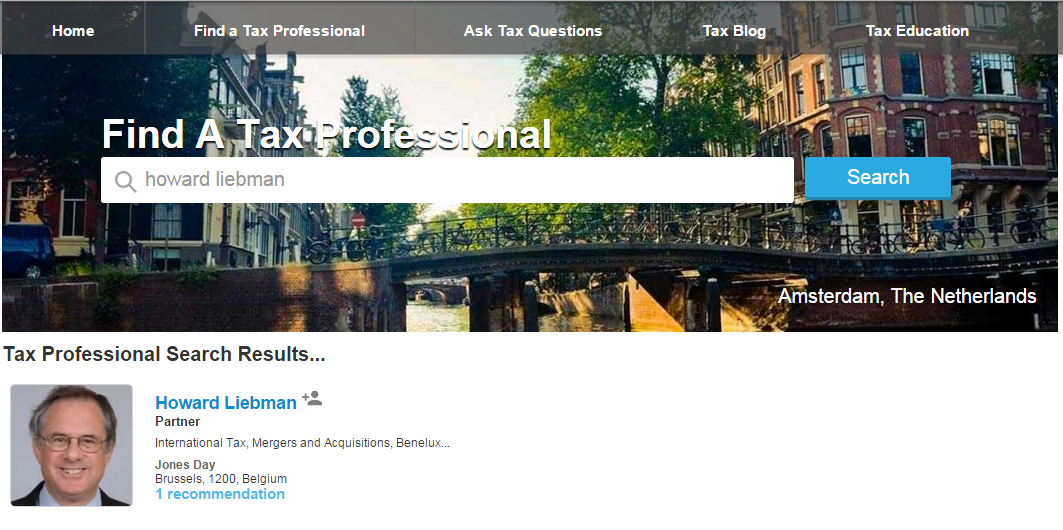
- Click on Find A Tax Professional and type in the name of the person you want to write a review and you will be
redirected to the following page: - Click on the small snapshot overview of the tax professional and their full professional page will appear with a button
Click To Write A Review. You will click on this button to write the review which they must approve for publication.
If this is your first visit to TaxConnections, you have two available options:


- Difference Between A Free Tax Professional Membership And A Premium Tax Professional Membership
-
- Higher Ranking On Find A Tax Professional Search Feature
- Direct Referral Business From TaxConnections To You
- Blog Posts Distributed To TaxConnections Global Audience
- Powerful Features That Boost Your Visibility on Google
- Promote Your Webinars, Use Our Platform Services
- Promote Books And Publications, Increase Sales
- Virtual Offices With Valuable Member Resources
- Education On Engaging With U.S. Congress/Tax Legislation
- Private Introductions-Connecting Is Our Expertise
- Training Webinars On Advanced Use Of TaxConnections
With TaxConnections, you do not even need a credit card unless you choose to upgrade. The only reason to upgrade from a Free Tax Professional Membership to a Premium Tax Professional Membership is when you want any of the following extra services provided with a Tax Professional Premium Membership
- Upgrade From Taxpayer To Tax Professional Member
-
- Upgrade Free Tax Professional Membership To Premium Membership
- Once in Account Settings, click on Update To Paid Member.
a) Login at www.taxconnections.com b) Click “Welcome Your Name” in the top right corner. c) Scroll down and click Account Settings.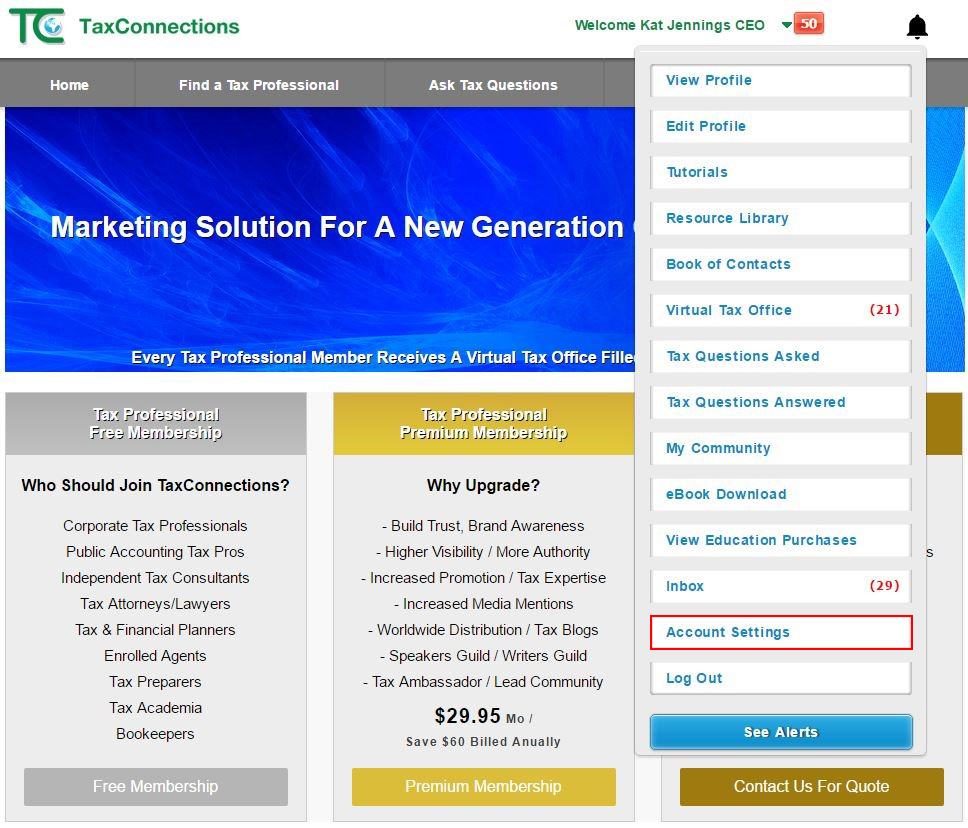

- Update Your Email Address For Your Account
-
- Go to www.taxconnections.com and Login.
- Click on “Welcome Your Name” dropdown navigation bar.
- Click on Account Settings in the dropdown navigation bar and the screen below will appear.
Click on Edit to the right of your Email Address to update.
- Change Your Password For Your Account
-
- Go to www.taxconnections.com and Login.
- Click on “Welcome Your Name” dropdown navigation bar.
- Click on Account Settings in the dropdown navigation bar and the following screen will appear.
Click on Edit to the right of your Password to update.
- How To Access Your Virtual Tax Office
-
- Go to www.taxconnections.com and Login.
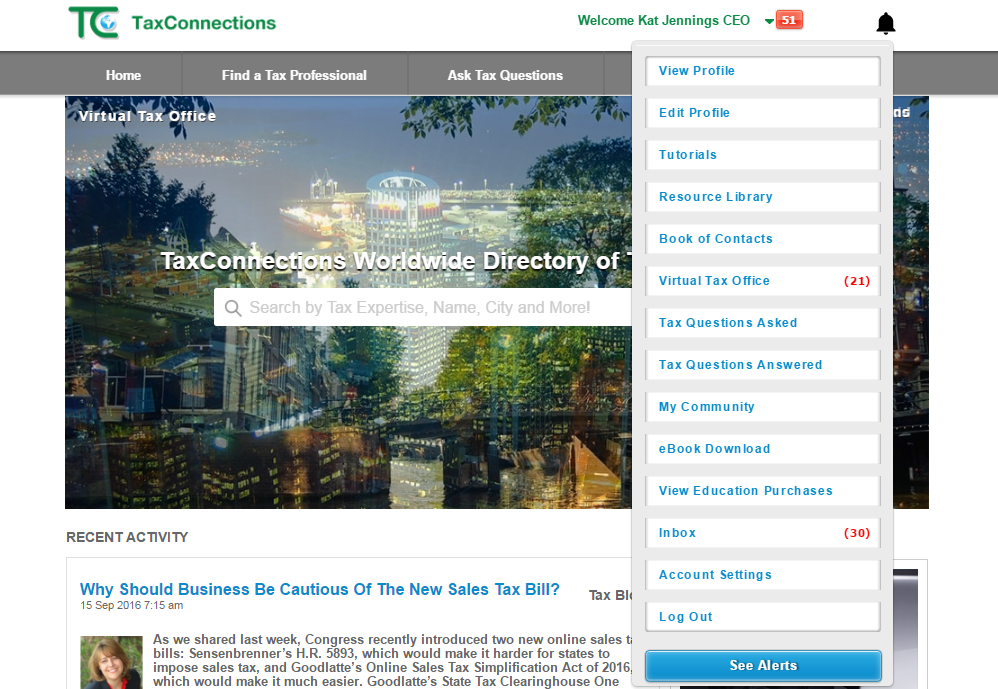
- Click on “Welcome Your Name” dropdown navigation bar.
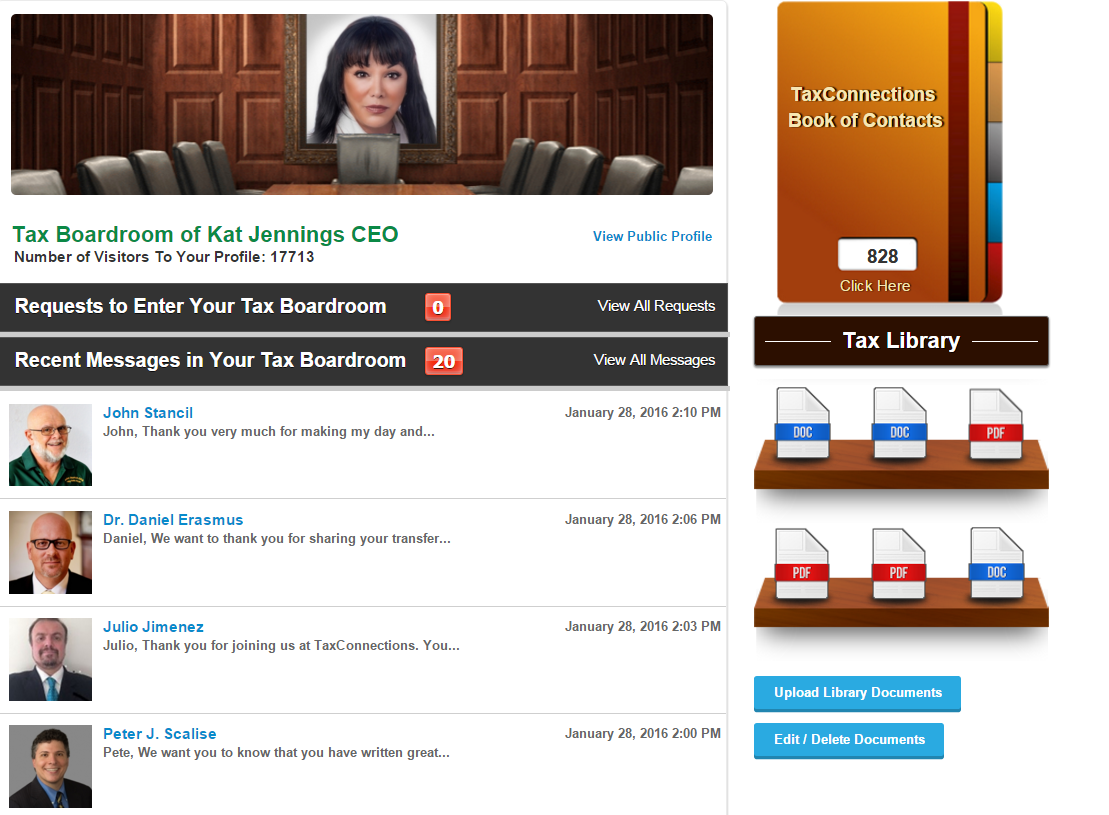
- Click on Virtual Tax Office and the following screen will appear.
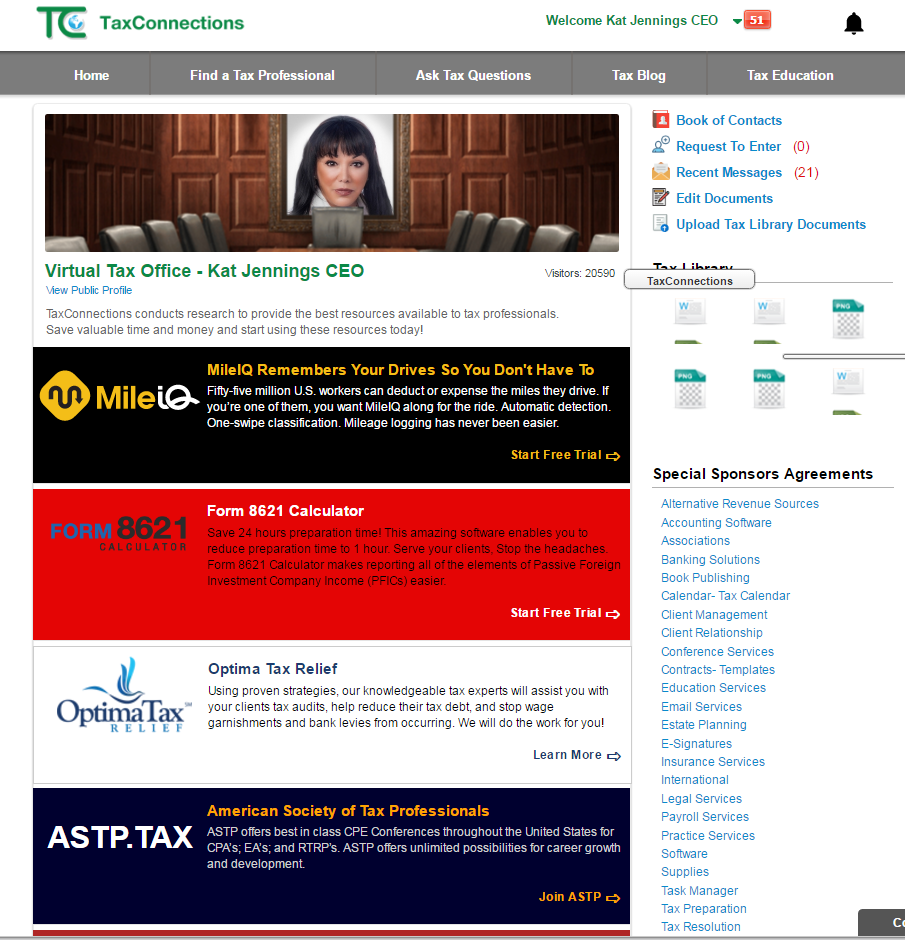
- You are now in the Virtual Tax Office which serves as a virtual tax office and message center. /ol>
- How to Login To TaxConnections
-
- Go to www.taxconnections.com and Login.
- a) Sign Up as a Taxpayer (Membership is FREE!)
- b) Sign Up as a Tax Professional (Get Listed)
If this is your first visit to TaxConnections, you have two available options:
- Go to www.taxconnections.com and Login.
- How To Use Your Welcome Navigation Bar
-
- Go to www.taxconnections.com and Login.
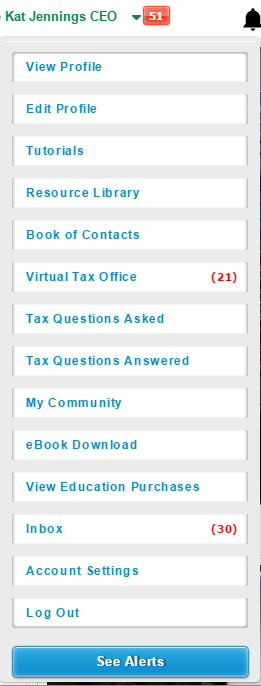
- Click “Welcome Your Name” dropdown navigation bar as shown in the example below. Our Tax Professional
Members have many more tools available to them than a free taxpayer membership. We help tax professionals
build visibility and authority for their tax expertise. TaxConnections has created features that enable our visitors
and tax professional members to interact easily with each other.
- How To Edit Your Tax Professional Profile
-
- Go to www.taxconnections.com and Login.
- Click on “Welcome Your Name” dropdown navigation bar located at top of screen.
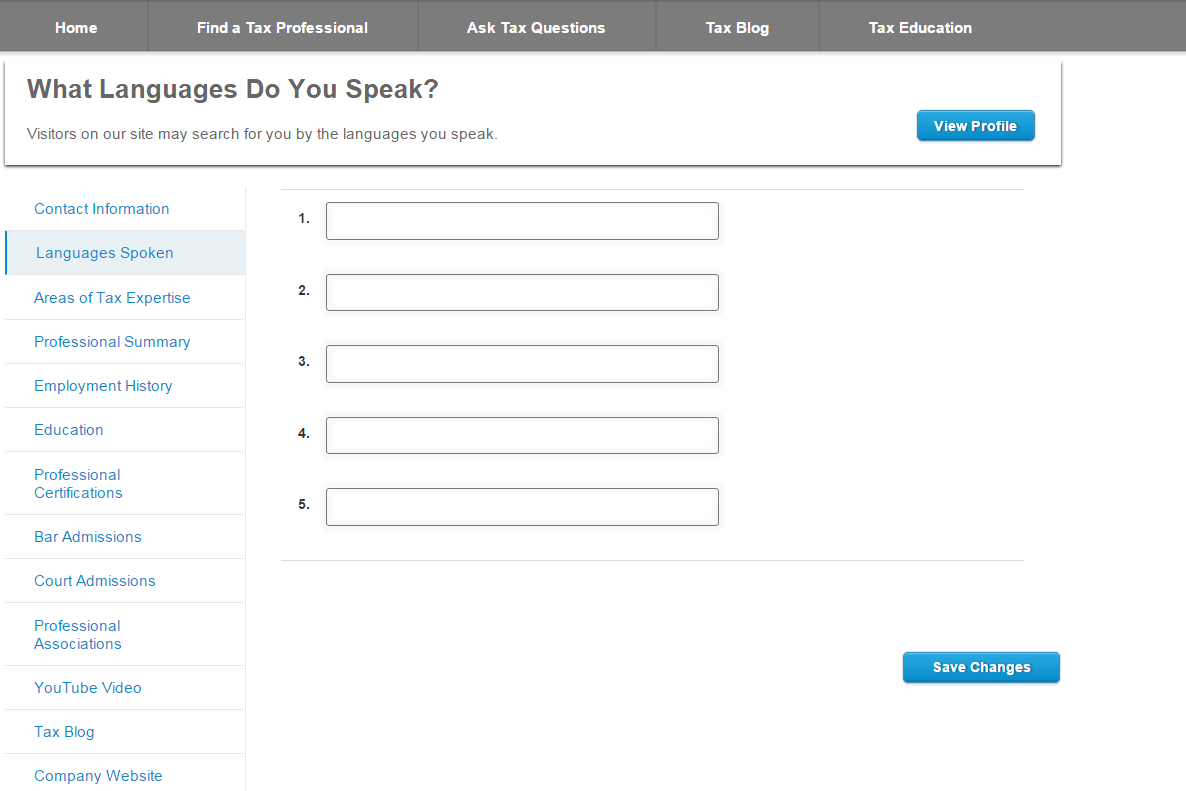
- Click Edit Profile to view the category below on the left of your screen.
- Select the category you want to Edit on your professional profile page.It is very important to click the Save Changes
button after each page edited!


An Example of Editing A Section Of Your Professional Profile:
- How To Upload Your Photo To Your Professional Profile
-
- Go to www.taxconnections.com and Login.
- Click on “Welcome Your Name” dropdown navigation bar.
- Click Edit Profile and this screen will appear. Now click on Upload A Picture!
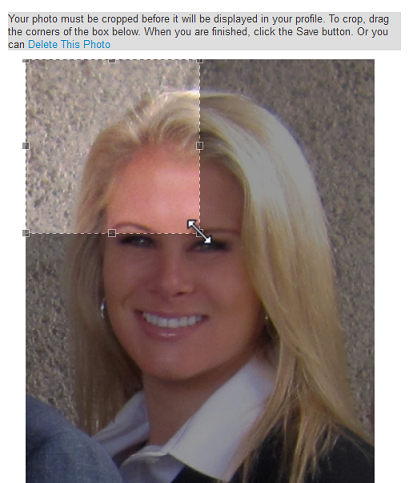
- Upload A Picture by clicking Browse and our program will search your computer for your photo. The format needs to be .jpg or .png and once you double click on the photo and select a photo from your desktop it will automatically upload to your professional profile page.

- Sometimes a photo will need to be cropped for better viewing. Simply click from the corner and stretch the area you would like to crop for your photo. See below:
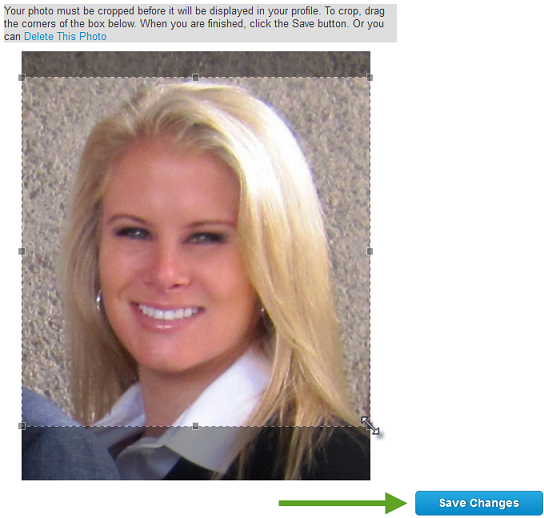
- Click Save Changes to set your photo to your Profile. This step will place you on the Home Page in the Featured Tax Professionals section when your profile has been completed within the ten days of Sign up!
- Now go back to your Welcome Your Name dropdown navigation bar and click on View Profile to check your photo upload.
Special Note: TaxConnections only allows photos of tax professionals. The reason is photos builds trust and created more connections!
- How To Upload Video To Your Tax Professional Profile
-
- Go to www.taxconnections.com and Login.
- Click on “Welcome Your Name” dropdown navigation bar.
- Click on Edit Profile in the dropdown navigation bar.
- The following screen will appear:
- Click on YouTube Video! You need to upload your Video to YouTube first as we simply grab the link from your YouTube video and Upload it to your TaxConnections profile.
- Now follow these instructions below:
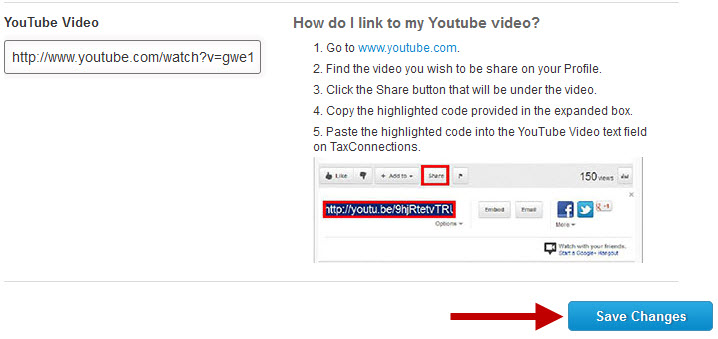
- Once you have pasted the YouTube code in the YouTube Video text field, select Save Changes.
- Go back to your Welcome Your Name dropdown navigation bar and click on View Profile to check that your video uploaded properly.
- How To Write Your Professional Summary Like An Elevator Pitch
-
It is important to write your Professional Summary in a way that communicates your vital message. This is the first glimpse into the strength and reputation of your tax expertise. The goal is to motivate viewers to see you as an authority in your area of tax and take action!
In Silicon Valley, everyone depends on their elevator pitch to promote themselves. An elevator pitch is an interesting and upbeat way to describe what you do. It is a tightly focused professional summary and motivates others to take an interest in you. A great elevator pitch motivates prospective clients, business relationships and potential employers to become more interested in you! Your pitch should center around these four questions:
1. What problem(s) do you solve?
2. What is it that you actually do?
3. What kind of success have you experienced?
4. What is your goal or mission?The message must be strong and unique enough to get people to pay attention to you. What tax problems do you address? Explain what it is that you do that provides a solution. Give examples of relatable experiences with others and what you are doing that will help them solve problems. Let them know you have a purpose and what that purpose is! Gain a significant professional advantage when you build a Professional Summary that motivates people to take action with you.
Example Template - Build A Compelling Professional Summary
My name is XXXXXXX and I am a (Tax Title) with (years of experience) in (three areas of tax expertise). Explain what your tax expertise will do for others; what problems do you solve? What technical skills do you bring to an organization? Now provide examples of work you have done that have produced great results for your client or company.
My purpose is to (save you time and money on your tax return, protect you on tax audits, represent you professionally, etc. or My purpose is to assist companies on building a tax department…. or My purpose is to find a new tax job as a Tax Director in the San Francisco, CA area... Please contact me about any consulting projects you have in (i.e. international tax, federal tax, expatriate, partnership taxes, etc..). I am available to assist you immediately.
Special Note: Email me and I will send you (give them a reason to contact you for free, this is called a lead magnet, give them a copy of a publication or report or list of projects or a tax planner which you can upload into your TaxConnections Tax Library) - How To Answer Tax Questions
-
- Go to www.taxconnections.com and Login.
- Click Ask Tax Questions in the top of the TaxConnections Header Bar as displayed below.
- You will be redirected to the Ask Tax Questions page. Type any letter into the search bar where it says
Enter Your Tax Question Here... - Click the All Questions dropdown box as displayed below. You have the option of selecting Answered Questions
or Unanswered Questions. Click on the Country dropdown box to select the country associated with the tax question. - Click on any tax question you want to answer; and the Answer This Question Box appears. Type in your response and select Submit Answer.
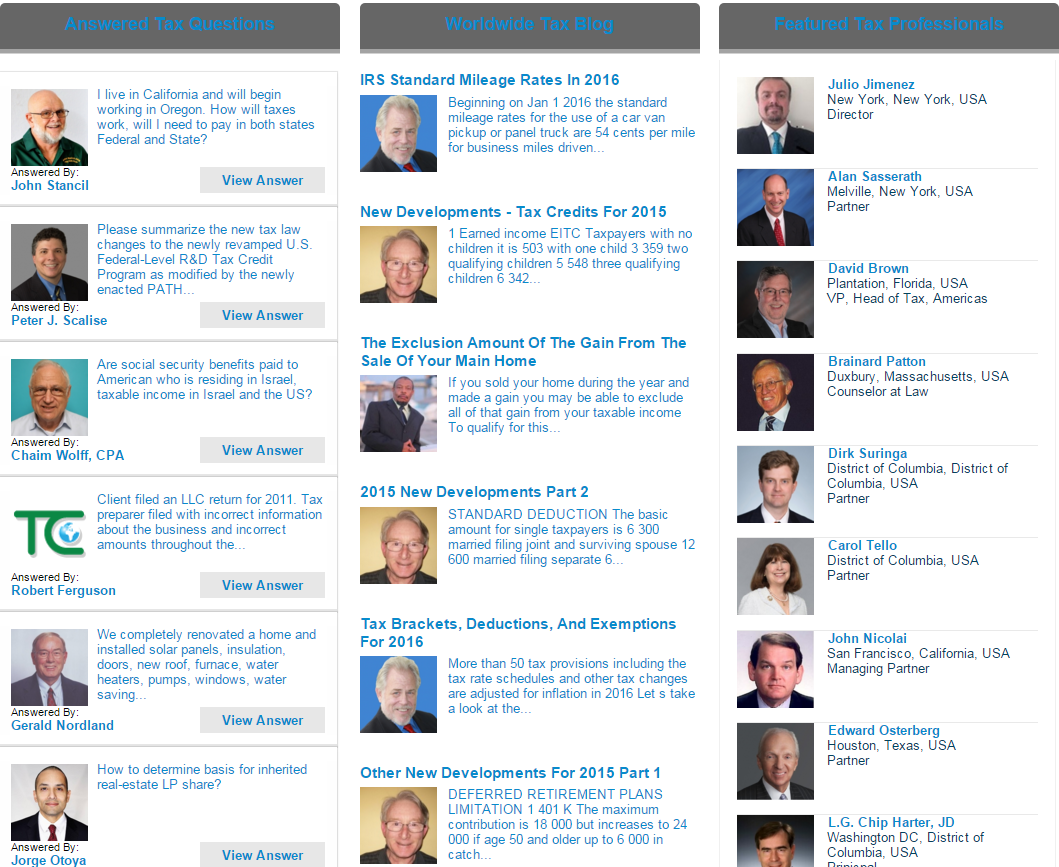
- Whenever you Answer A Question your Professional Profile appears on the Home Page.
SPECIAL NOTE: Olny TaxConnections tax professional members are able to answer tax questions on this site. We promote our members on the Home Page each time they answer tax questions.

- Search Unanswered Tax Questions
-
- Go to www.taxconnections.com and Login.
- Across every page of the TaxConnections site is the Header Bar and it looks like this bar below...
- Click on Ask Tax Questions in the Header Bar and you will be redirected to the following page:
- Click on All Questions and then click on Unanswered Questions.
- Make certain you also Select Country to refine the location.
- You can also select Tax Questions By Topic.
- Build A Book of Prospective Clients And Referrals
-
- Go to www.taxconnections.com and Login.
- Click on Welcome Your Name dropdown navigation bar
- Click on Book of Contacts on the dropdown navigation bar and you can view all the people you have allowed to contact you and all your messages are free.
- It is easy to continue to build your Book of Contacts. Just go through TaxConnections Worldwide Directory of Tax Professionals; search for a tax professional and click the Send Message envelope located under their photo.
- How To Download An eBook Purchased
-
- Go to www.taxconnections.com and Login.
- Click on "Welcome Your Name" green dropdown navigation bar at top of screen.
- Click on eBook Download. to access your purchase from our tax professional member.
- If you require any assistance, please contact us at 858.999.0053.
- What Is A Tax Library?
-
- Go to www.taxconnections.com and Login.
- Click on “Welcome Your Name” dropdown navigation bar located at top of screen.
- Click on Virtual Tax Office and your private virtual office will appear.
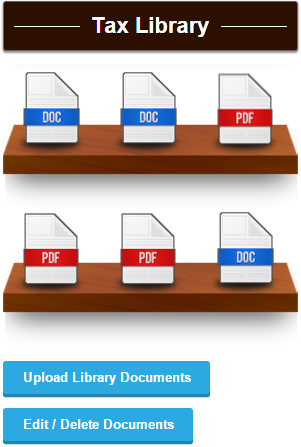
- 3. On the right side of your screen will be your Tax Library. Click on the blue buttons located just below your Tax Library to Upload Library Documents or Edit/Delete Documents.
Our Tax Professional members are provided a Tax Library to upload up to 9 documents on their professional profile page.
Building a Tax Library keeps people interested and curious about your tax expertise.
- How To Upload Documents To Your Tax Library
-
- Go to www.taxconnections.com and Login.
- Click on “Welcome Your Name” dropdown navigation bar located at top of screen.
- Click on Virtual Tax Office and your private virtual office will appear. On the right side of your screen will be
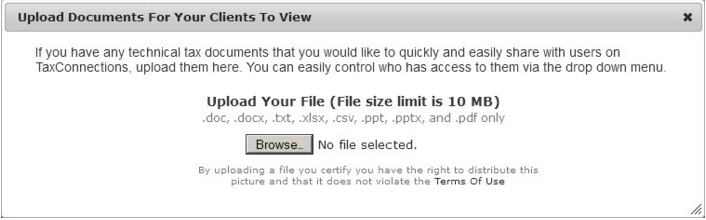
your Upload Library Documents button. Click on this button located just below your Tax Library. - A popup screen will appear that enables you to upload your documents. You must click Browse to locate the document
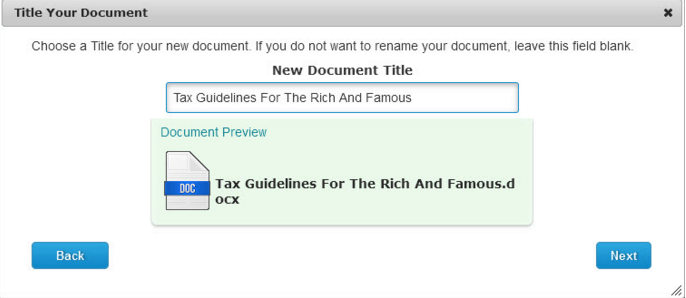
on your desktop and then double click the document to place it in your Tax Library. - You will then be prompted to Name New Document Title.
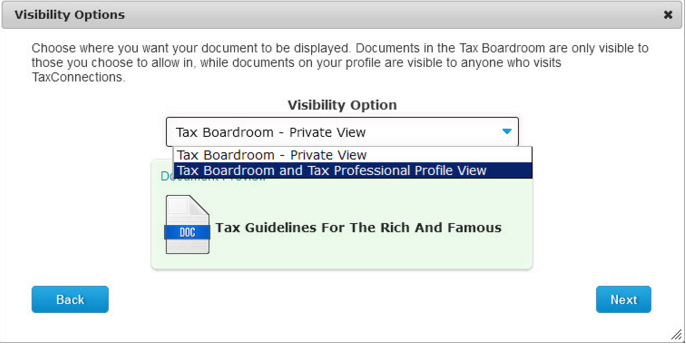
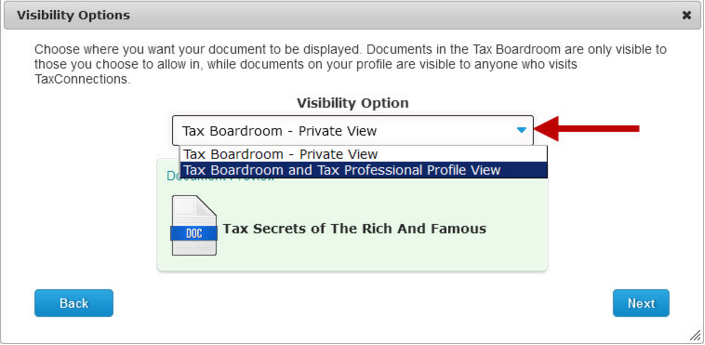
- You will now be given a visibility option. You can select one of the two choices:
a) Virtual Tax Office- Private View means only those invited into your private office can view your documents and publications.
b) Virtual Tax Office and Tax Professional Profile View means that anyone viewing your profile can also browse through your Tax Library. (SUGGESTED VIEW) - Click on Next until you see the Finish button! It is important to click Finish!
- You can place up to 9 documents or publications into your Tax Library.
Your Personal Tax Library Encourages Visitors To Browse And Learn More About Your Tax Expertise
- How To Delete Documents In Your Tax Library
-
- Go to www.taxconnections.com and Login.
- Click on “Welcome Your Name” dropdown navigation bar.
- Click on Virtual Tax Office and your private virtual office will appear. On the right side of your screen will be your
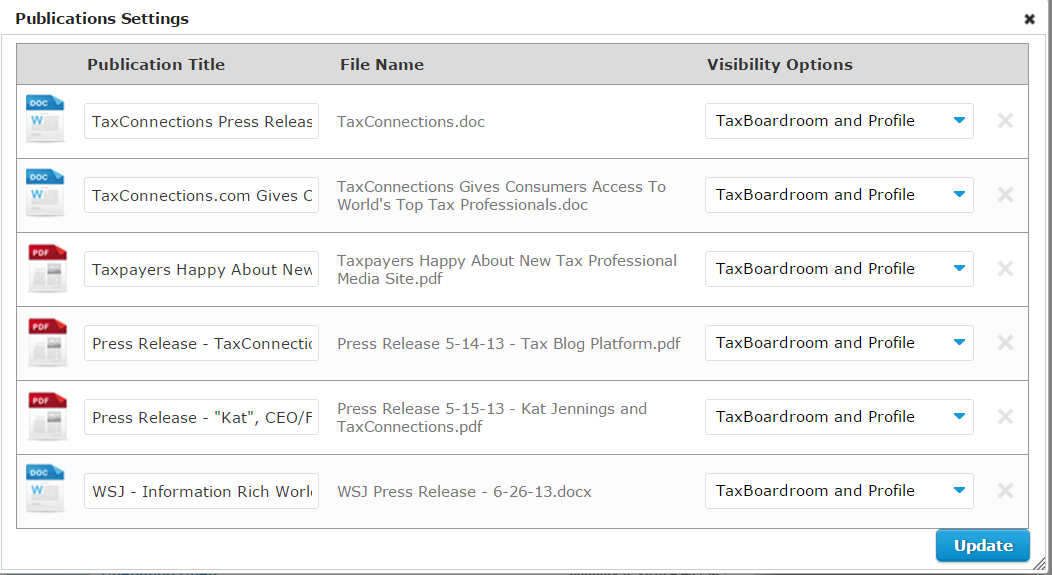
Edit/Delete Documents button. - Select the Edit/Delete button and a list of all your Documents listed in your Tax Library will appear.
Click the X located at the end of any row of a document you want deleted. Click the Update button at the bottom far right!
You are then finished. - You can place up to 9 documents/ publications into your Tax Library to be displayed on your Tax Professional profile page.
- How To Upload To Tax Library (Private View Only)
-
Tax Professional members may elect to upload documents to their Tax Library so only those individuals they have accepted into their Virtual Tax Office can see it.
- Go to www.taxconnections.com and Login.
- Click on “Welcome Your Name” dropdown navigation bar.
- Click on Virtual Tax Office and your private virtual office will appear. On the right side of your screen will be your
Edit/Delete Documents button. - Click on Upload Library Documents and the following screen will appear. Click on Virtual Tax Office- Private View
to hide the document from anyone you have not accepted into your Virtual Tax Office. - Click on Next until you see the Finish button! It is important to click Finish!
- You can place up to 9 documents or publications into your Tax Library.
- View Your TaxConnections Notifications
-
- Go to www.taxconnections.com and Login.
- Click on “Welcome Your Name” dropdown navigation bar.
- There are three types of notifications indicated by red numbers:
a) Virtual Tax Office notifications are from your virtual tax office!
b) Inbox messaging center handles a wider range of communications.
c) Alerts remind you who just connected with you.
TaxConnections sends members a notification when they have a message waiting from one of TaxConnections site visitors. Here is how to find your notifications.
- How To Add Tax Questions Answered Widget To Your Website
-
Tax Questions Answered Widget
TaxConnections Members benefit everytime they Answer A Tax Question. This valuable Widget enables members to transfer tax questions they answer on TaxConnections to their very own site.
- 1. When you Answer A Tax Question on TaxConnections the following happens:
- a) You appear on the very active TaxConnections Home Page.
- b) This appears on your Tax Professional Profile page.
- c) You receive a higher rating on our site.
- d) You generate more content for your own site using widget.
- Instructions To Embed Code (Ask your website developer to do this for you.)
- Simply copy and paste the HTML Code on the page you would like your TaxConnections Tax Questions Answered Widget to appear.
- How To Create A Private Community On TaxConnections
- Go to www.taxconnections.com and Login.
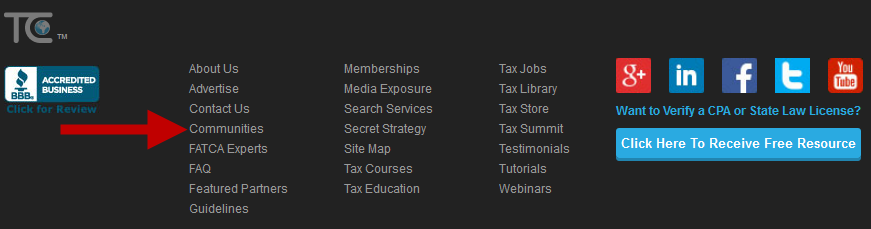
- Scroll to the bottom of the page and select “Communities”.
- Select “Create A Community”.
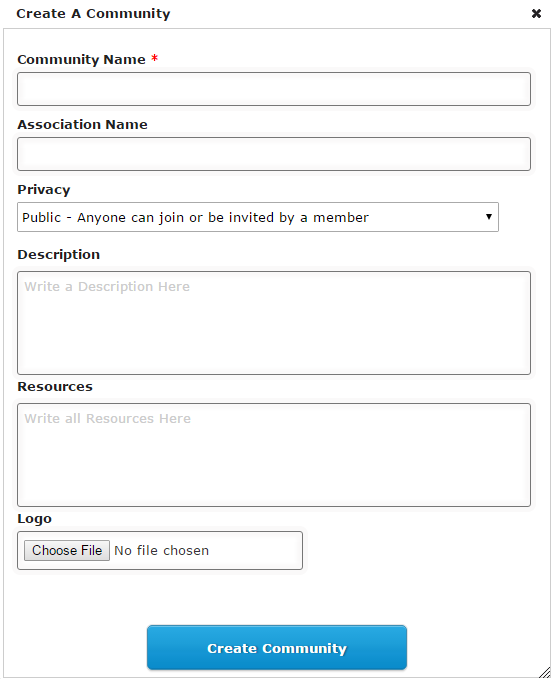
- Once you click the Create A Community button the following pop- up wil appear. If it does not then use another Browser as some Browsers are not friendly with pop-ups. Here is what the screen will look like:
- First enter your Community Name. If you are an Association, you can place the name of your Tax Association on the text box below Community Name.
- Now click on PRIVATE to keep your Community PRIVATE.
- Write in a description of your community and recommend who should request an invitation to your private community.
- Upload your PHOTO as the Moderator/Administrator of the PRIVATE COMMUNITY.
- As the Moderator/Administrator of a PRIVATE COMMUNITY you have control over deleting posts, editing posts and invitations of new members in your PRIVATE COMMUNITY. "Your PRIVATE COMMUNITY CANNOT BE SEEN BY NON-COMMUNITY MEMBERS.
- Now Login; Go to your “Welcome Your Name” dropdown navigation bar and click on My Community to get started with building your PRIVATE COMMUNITY.


- Email Signature Badge Increases Traffic
- 1. Go to www.taxconnections.com and Login.
- 2. Go to the Welcome Your Name green dropdown navigation bar and click it.
- 3. Click on Secret Strategy and then Secret Strategy #1.
- 4. Select the Badge you prefer by clicking on the radial dial next to it.
- 5. Right Click on “Copy Image” so you have copied the Email Badge.
- 6. Go to your Microsoft Outlook and open up a New Email Message.

-

-

-

-

-

-

-

- 7. The following screen will open to enable you to send a new email message:
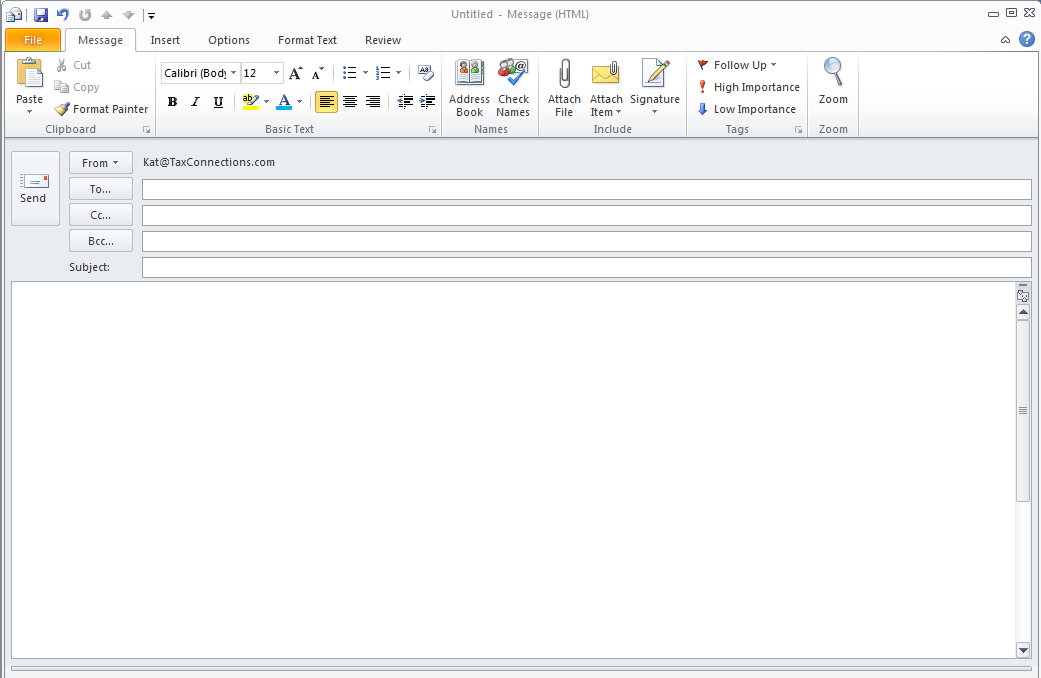
- 8. Click on Signature at top of the new message email. When icon opens click Signature again.

- 9. You will then see the following Signatures and Stationary popup below. Right click your mouse and place the Badge code you copied anywhere on your signature. Remember we asked you to copy it earlier so it should sitting in your mouse ready to paste in your signature window. See Example A below!
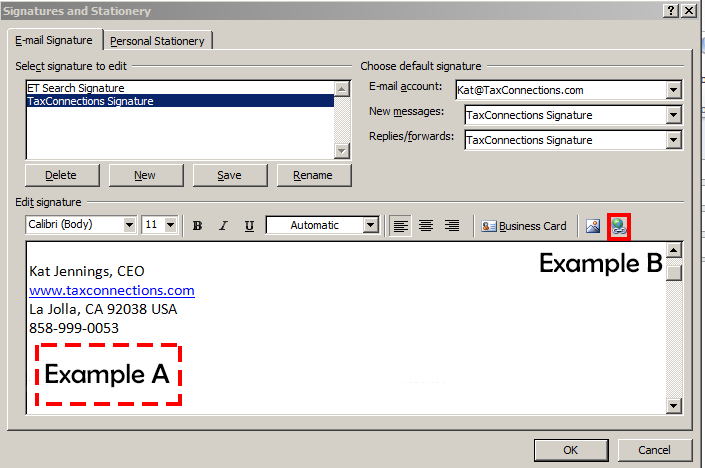
- 10. Now there is one last step to complete the Email Badge Signature process.Left Click Example A to input Badge first and then Left Click on Example B
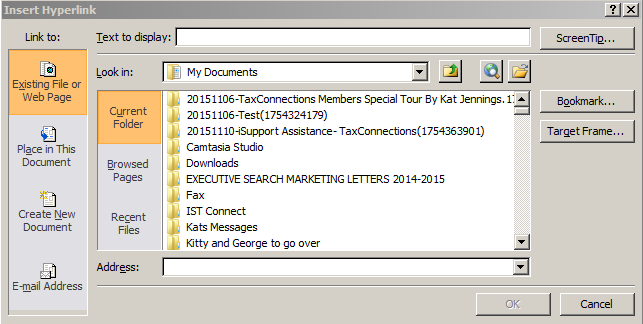
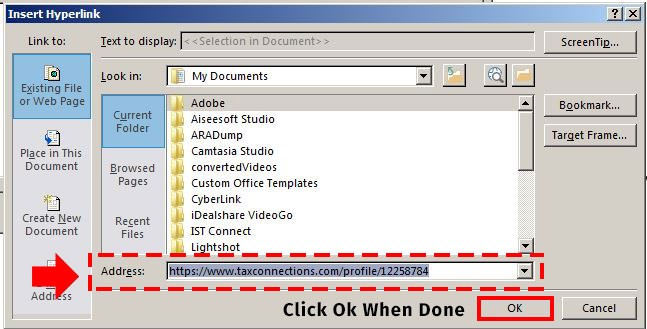
- 11. Paste this link in the Address Box and Click “OK”.
Email Signature Badge Provides A Significant Marketing Edge
And Increases Traffic To Your Professional ProfileTaxConnections members develop a steady stream of new views when placing this valuable Email Badge next to their Email Signature. Place the code below next to your email signature for more traffic and more eyes on your expertise. You can develop more clients by reminding them of your expertise in a simple email communication. Besides, people are innately curious as to what is behind the Click Me button!
All the best,
Kat Jennings,CEO
TaxConnections
La Jolla,CA 92038
858.999.00053
(There are many styles of badges to choose from!)
Instructions For Placing An Email Badge(You can do this yourself!)
TaxConnections Bloggers Frequently Asked Questions
- Register To Blog On TaxConnections Worldwide Tax Blogs
-
IMPORTANT NOTE: Our Tax Blog is set up on WordPress and has a separate Login Passcode which will be issued
- Go to www.taxconnections.com.
- Click on Tax Blog in the grey header bar you will be directed to TaxConnections Worldwide Tax Blogs landing page
located at this link https://www.taxconnections.com/taxblog. - The next step is scrolling down on this page until you see Blogger Login on the lower right hand side of your computer screen.
CLICK ON THIS BUTTON!
- If this is your very first time to Register to blog on TaxConnections Worldwide Tax Blogs, we need you to click on the Register
link as show below: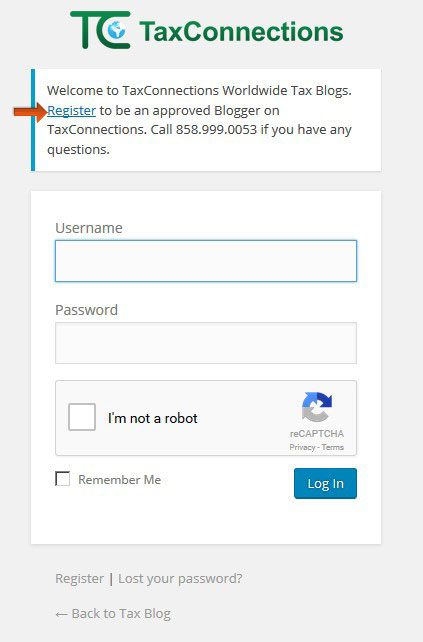
- The following Registration Form will appear inviting you to Register. Once you Register to Blog, your request is sent to our
Adminstrator for Approval.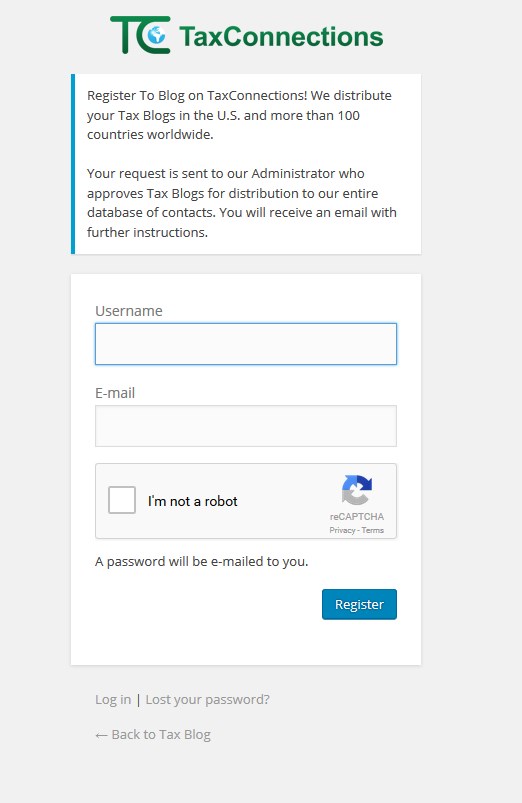
- Upon Approval, you will be sent a Password to Login along with Instructions on how to set up your tax blogger profile; and
how to submit your tax blogs for distribution to our global network of loyal readers in over 150 countries. - If you do not receive a message from us within 24 hours for approval to submit your tax blogs, we recommend you check
your junk mail first. See example of Approval Message that was sent to Junk Mail. We ask you to call us at 858.999.0053
if you have not receive approval within 24 hours. Our entire team is here to make you happy!
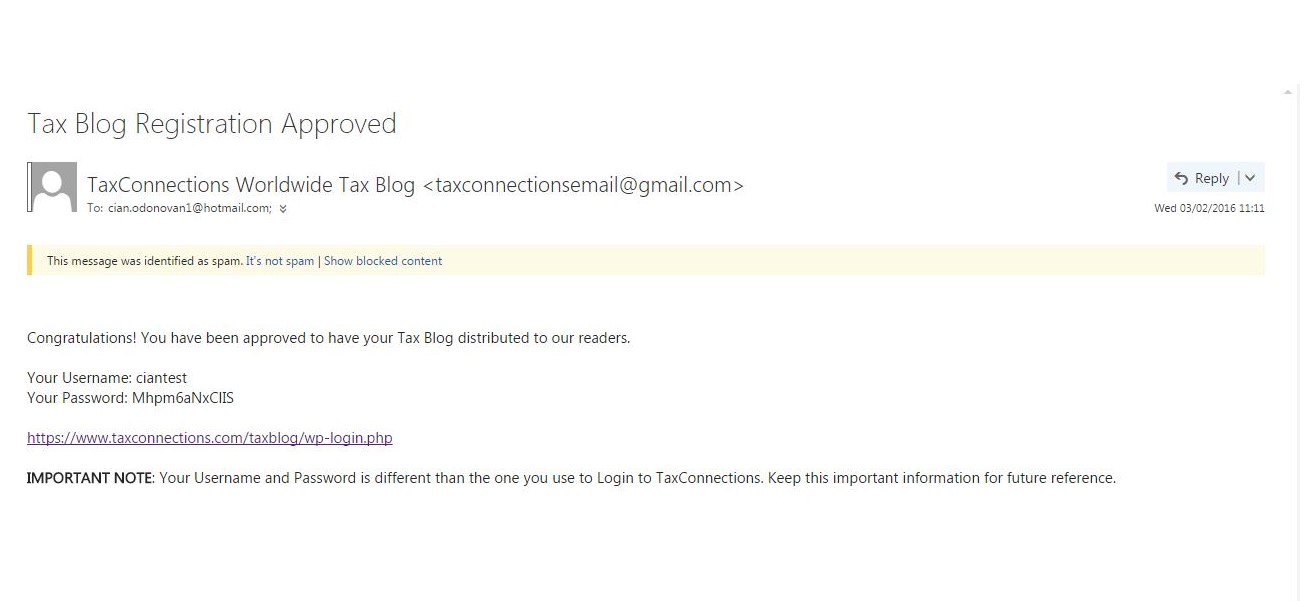
to you once you are approved. You must be a Tax Professional member in order to gain permission to blog on
TaxConnections and benefit from our worldwide distribution network. Click Here To Join TaxConnections First.
- Set Up Your Blogger Profile (After Approved)
-
IMPORTANT NOTE: If this is your very first time to Register to Blog on TaxConnections, you must go to this link to
- Go to www.taxconnections.com.
- Click on Tax Blog (grey header bar example below) and you will be directed to TaxConnections Worldwide Tax Blogs
landing page that is located at the following link: https://www.taxconnections.com/taxblog.
- Once you are on the Worldwide Tax Blog page scroll down until you see the Button that states Blogger Login.
Scroll down the page until you see it located along the lower right hand side of your computer screen. Click on the Blogger
Login button below!
- Enter your Username and Password into the Blogger Login. If you cannot remember your Username or Password please
send a message to blog@taxconnections.com or call 858.999.0053 and we will be happy to help you.
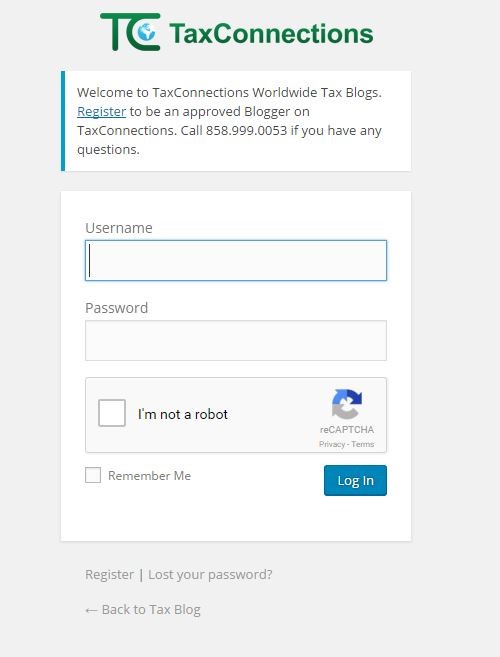
SPECIAL NOTE: If you have any difficulty signing in we recommend you try signing in with another web browser as some do not work with the WordPress Captcha Security settings. - Once you Login, you will be brought to TaxConnections Worldwide Tax Blog Dashboard.Click on "Profile" on the Menu
Bar at the left of your screen to fill in your Blog Biography.
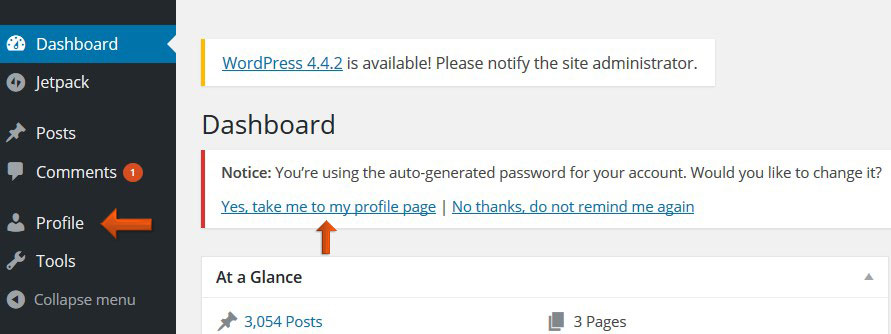
- We suggest that you fill out your Blog Biography and upload a photo!
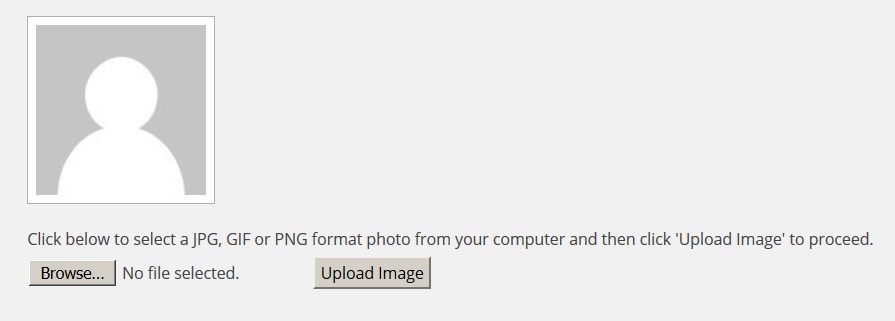
- Upload your Photo by clicking the box next to "Browse" to search your computer for your picture. Double Click the photo
you have on your computer and select "Upload Image
- You are now ready to return to "Posts" to submit your Blog for review and Publish to TaxConnections Worldwide Tax Blogs
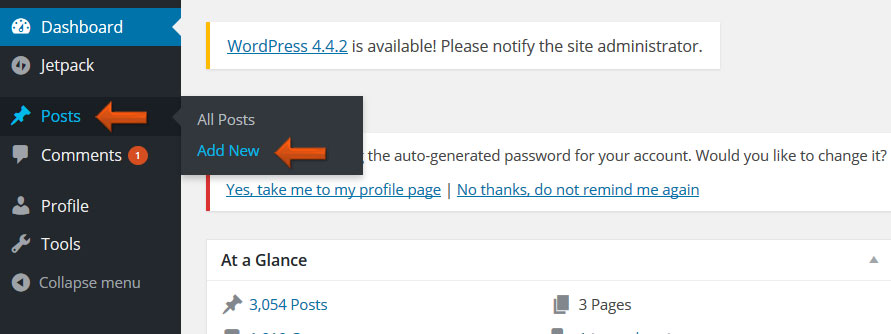
- The first step in posting in TaxConnections Worldwide Tax Blogs, is naming your Post.

- Once you have chosen the perfect title for your post, you can now enter in the text of your blog.

- The final step in writing a blog is to submit for review! Congratulations! You have now posted your first blog! You must
submit it to TaxConnections for your review! Click Submit for Review blue button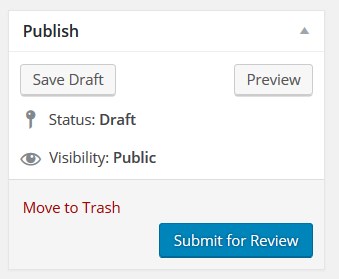
Register first! After approved you can then set up your Profile as a Tax Blogger on TaxConnections.
- How To Post Your Tax Blogs
- Go to www.taxconnections.com.
- Click on Tax Blog (grey header bar example below) and you will be directed to TaxConnections Worldwide Tax Blogs
landing page that is located at the following link: https://www.taxconnections.com/taxblog.
- Once you are on the Worldwide Tax Blog page scroll down until you see the Button that states Blogger Login. Scroll
down the page until you see it located along the lower right hand side of your computer screen. Click on the Blogger
Login button below!
CLICK ON THIS BUTTON! - Enter your Username and Password into the Blogger Login. If you cannot remember your Username or Password please
send a message to blog@taxconnections.com or call 858.999.0053 and we will be happy to help you.
SPECIAL NOTE: If you have any difficulty signing in we recommend you try signing in with another web browser as some do not work with the WordPress Captcha Security settings. - You are now ready to Post and submit your Blog for review and publication on TaxConnections Worldwide Tax Blogs.
- The first step in posting in TaxConnections Worldwide Tax Blogs, is naming your Post.
- The next step is placing your tax blog into the area provided below.
- The final step in writing a blog is to submit for review! Congratulations! You have now posted your first blog! You must
submit it to TaxConnections for your review! Click Submit for Review blue button
Upon approval, your Tax Blog will be distributed worldwide!
- How To Search TaxConnections Tax Blogs For Specific Tax Topics
- Go to www.taxconnections.com/taxblog
- Scroll down and you will see the following:
- Type in the topic of tax blogs you are interested in
viewing and click on the ‘Search’ button. This will
bring up all Tax Blogs posted on TaxConnections
related to the topic you input into search bar.